Sunflower

Sunflower

Wednesday, May 31, 2017

A Year Raising Rabbits

    When we started raising meat rabbits, I had never even eaten them before. Not even wild ones. But I heard that they were good, and take up less space and are easier to house, feed, and care for then other meat animals.  So, after reading a lot about the subject, the girls and I picked out two lovely Rexes, a buck and a doe, to start out.
    I should have read more.
    Not that the rabbits were a bad choice, it's just that they were mini Rexes. Not the best choice for meat rabbits. Fortunately, a neighbor was kind enough to give us a New Zealand (i.e. bigger) rabbit. HE was supposed to be a girl. When we found out his true sex, in a REALLY OBVIOUS way, we had to get another doe. Shucks, I have to get another bunny!😁


Sweet Pea
   Sweet Pea was the last rabbit we bought. She was the mother of one of my best breeders. All the other breeders I have were born and bred here.  Except Pepper. She just wandered into the yard one day, was easily caught, and has stayed here ever since and produced most of my breeders.
    Things can change a lot in a year with rabbits, especially ones who live in a colony. Every 30ish days, more babies are born to at least one mother. Babies grow up, get processed or sold, and some have had babies themselves. I started with a wood-framed wire box, which became the foundation for a colony. Then I bought a small hutch, then a bigger hutch, and then another smaller one, all of which are in use.
Current colony
    It isn't easy processing these formerly cute fuzzballs who I played with and held from birth, because it shouldn't be. Ending a life isn't something to be taken lightly. I just have to remember why I am doing this. I am providing food for my family that was well taken care of and not mistreated as can happen on commercial farms.
    Unfortunately, sometimes you also have to deal with unexpected deaths. I have had a pregnant doe die for no reason, and several kits.  The doe was buried, and the kits were sold to give nourishment for snakes.
    People ask how many rabbits I have. I usually answer that I don't count. That way if my husband asks how many there are, I can honestly say I don't know!
    I did count. I currently have 50: breeders, babies, and grow outs.
    Wait, I had 13 born last week...

Tuesday, May 30, 2017

Ho. Lee. Cow.

    Wow, yeah. It's been over a year since I last posted. I'd like to have a good excuse, such as "I was in jail/ hospital/ asylum/ deserted island." None of these apply (yay?). I guess I just haven't had the energy to talk.
    Now I do.
    I'll post some catch-up posts soon, but until then, here's some pictures.


Saturday, February 6, 2016

Making Yogurt

 
In my reading about the best things to eat to help your intestinal flora, I found that yogurt was something that I would actually eat.  But I wanted to make it myself, so I could make sure of what is in it.  I bought some starter culture from a website that sells a lot of that kind of thing.  It had two packets, and I tried to make yogurt with them two separate times. It was supposed to be okay to make without a yogurt maker or heat, but it didn't work for me. I just ended up with sour milk.
   I didn't want to give up, though, so I looked it up on the internet. I went to this site and this site and cobbled together a technique that worked for me! It uses a crock pot as a source of heat.
 Ingredients:
  1/2 gallon of milk (whatever kind you want)
  2 TBSP yogurt

    Heat milk in crock pot on low for two and a half hours. This kills all bacteria and cultures so the ones you put in it will be the only ones. Unplug and allow to cool in pot for three hours.  Take a cup of the heated milk out and whisk in the yogurt. Stir the starter-yogurt mix into the rest of the milk.           Replace cover, wrap pot in wool blanket or towels and place in an UNHEATED AND OFF oven with the oven light on. This will keep the milk at the right temperature to turn it into yogurt. Let sit ten to twelve hours or overnight. Do not open the door! You'll disturb the yogurt-fairy and ruin a half gallon of milk.
    The next day, line a colander with a thin tea towel (I used an old calendar towel), and place over a large bowl or baking dish. Pour yogurt into towel to strain, two hours for regular yogurt and three to four for Greek style.  The whey, which is mostly clear, will drain off.  The pig loved drinking it.
    Store yogurt in the fridge in a covered container. I used a quart canning jar.
The whey.
    You can leave it out at room temperature for a more tart taste.  Save two tablespoons for the next batch!
     I have put honey, fruit, and my homemade granola in it. Put the granola on right before you eat it, though, or it will get soggy.

Saturday, January 30, 2016

We Said the Chickens Would Be First...

    The first farm-type animal we were planning on getting were chickens.  Then I went to the chicken swap at the local feed store.
    I came home with a five-month-old pot-belly pig boar. No, we aren't going to eat him, I just really love pigs. Also, I'm still hoping to convince the Wonderful Husband to let us breed them so we can eat the babies.  I just have to convince him that grass isn't that important in the backyard, since it bothers him that just one pig is digging it up!
He's not really orange, he's just been rooting in red clay.
    Then, I went to another chicken swap. I need to not take the girls with me to these things, since I came home this time with two rabbits; an eight-week-old Broken Castor (color) Rex (breed) doe, and a Red Eyed White Rex buck of six weeks. They are currently residing in the chicken coop until I can build a colony for them. I want to raise them for meat, but I would have to use them as breeders since Eldest Daughter and Baby Girl are waaaaaaayyy too attached to them.
    My Wonderful Husband says I am not allowed to go to the chicken swap anymore.  And someday, we will get chickens. I've got to build a bunny corral first.

Saturday, September 19, 2015

September Garden Update

  I tore out all but one of the tomato plants. They were not doing anything, and I am needing that space for the fall garden.  I also took the cucumber plants out of the ground since they were dying from something eating the leaves.  Some of the marigolds, as you can see, have done very well, and my peppers and okra are still going strong. Next week the fall garden goes in the ground.
  Last time, I mentioned that my seedlings tend to die.  I went to WalMart, got a $10 Grow light, and jury-rigged a set up for my babies.
 That is a stack of books and a little cabinet of small drawers keeping the light over my plants. They love it!  Except for the onions, which seem not to like me (the seemingly plant-free tin of dirt on the left).  It's not an elegant set up but at least it works and it didn't cost much. 

  This being my wedding anniversary, I told my husband I wanted to get garden stuff for my present.  I got a dwarf banana tree, a red navel orange, a satsuma tree (for my husband), a mulberry bush, a citronelle plant with a pot so we can take it wherever we are sitting, a treatment for the stinking ants that are eating my okra, a snake plant to clean the air in our bedroom, baby onion plants, and five bags of manure.  Yes, I bought bags of poop for my anniversary!  No, that is not a commentary on my marriage.
  The manure will be spread on the garden next week and tilled in for the broccoli, cabbage, and beets.  As you can see from the first picture, I have a lot of work ahead of me.

Friday, August 7, 2015

August Garden Update

 
Kiwi plant
I've been getting a plant here and there. I have so many things I want to grow!
   I planted a kiwi plant in mid-June, which is crawling along our south fence. A basil, bee balm, and sage will be part of my medicine/herb garden. I also put an echinacea and a lavender plant on the north end of the garden at the the end of July.
  My peppers like it out there, I have already picked two small orange ones and a large red (they were yummy).  Also liking where they are planted are the cucumbers (I've picked two and have several more growing) and some of the marigolds I planted to keep the tomatoes safe from bugs.  The tomatoes, on the other hand...  They aren't doing anything but growing very slowly and NOT putting out flowers and tomatoes!  Maybe next time I'll listen to my mother and bury some water bottles with holes in them to help deep-water the tomatoes. Yes, Mom, I should have listened to you. Don't expect me to say that again.
  The okra has finally started producing some beautiful flowers and okra!  Can you tell that they are related to hibiscus?

   Also, the snap beans never got more than a foot tall and where putting out beans less than an inch long and not worth eating.  I tilled them back into the dirt.  I'm preparing the soil for the fall garden!
   I have direct-composted an area where I will probably plant my root crops; carrots, beets, and sweet onions.  I will also be planting broccoli (Baby Girl LOOOVES broccoli),  and cabbage.
  I have already started the onions, cabbage, and broccoli seeds inside and have had the same amount of success with them as I usually have.
  That is to say, very little.
  They sprout, they grow a couple of tiny leaves, and they fall over and die.
   I need some growing lights.
   I think a trip to the ReStore to look for fluorescent light fixtures and cheap metal shelves is on the agenda for tomorrow.

One of the cukes

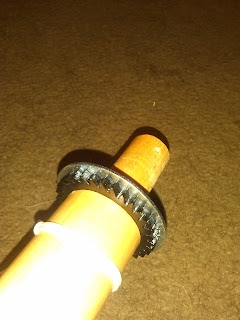
Changing the Ratchets and Pawls on the Kromski Harp

  When I got my Kromski Harp rigid heddle loom, the ratchets and pawls, which keep the warp from moving when you don't want it to, were plastic. On the first use, I realized that they weren't sturdy enough when they let my entire warp fall and become unwound!  Then, while I was looking for weaving-related presents for myself for Christmas, I saw a kit being sold to replace those plastic parts with metal, so I got it.  I had a new project to weave, so I decided it was time to do the job.
   I have always been very proud of how I can figure out how to do something by reading.  That is how I learned to weave, knit, spin, and put my looms, spinning wheel, and various pieces of furniture together.  Changing the ratchets and pawls wasn't any different.

   First, I had to make a copy of the template in the instructions. If I had just cut it out, I would have cut out the instructions on the other side.  The template shows where to put a screw in where there isn't one already. The screw is to hold a magnet, the magnet holds the ratchet, the ratchet is to hold the pawl.  
   But I'm getting ahead of myself.
   The right side of the loom is the side you have to work on so that was the side to take off.  I used the template to place the screw for the magnet, took off the old ratchets and  pawls, and attached the new ones. An extra washer to make everything fit a little more snug at each end, and then it is put back together.
  It works much better now that the teeth on the pawl don't bend.

 I have started a new project involving this loom. I don't want to say too much about it right now.  Gotta keep an air of mystery or something, donchaknow.